OK, I finally got my data models set up and working. I have the initial CakePHP set up on the site, it is using v1.3, and now I am ready to set it up for the Facebook integration, and start to add the integration. When we first set up the application on the Facebook side, I chose to do an “iframe” version of the application, as I want Facebook on my site, and be able to have integration with some of the great Facebook tools on the site, and be able to “promote me”. And remember this is just a way to show a possible real world example of how to integrate these things with your site. Actual applications may vary, but this is the base to integrate. At least, as of this posting it is the base, it may change in the future.
So lets go ahead and dive into it. If you do not have the application ID for your Facebook application, you can get it at the following:
http://www.facebook.com/developers/apps.php
The next thing is to grab the API and code from Facebook. This can be found at the following page:
http://developers.facebook.com/docs/
This is the main page, and you will need to scroll to the bottom of the page. This will list different APIs that are available. I am going to be using the PHP and JavaScript SDKs. This will provide the back end that I will want, and will also provide a positive user experience on the front end. So be sure to download both SDKs.
After that, now we need to start getting some stuff set up. In this post, I am just going to explain how to get this set up, and working right now. It is important that we get the correct items working, and so we will be working with the “pages” area for the JS SDK, and creating a very simple controller for the PHP SDK so we can get set up and running. I am just using, for right now, the base CakePHP CSS styles and layouts. All we need is a page to display some of the basic items to ensure that we have installed the SDKs in the proper locations. So lets go.
Step 1: Download the SDK and move them to the following locations:
A. PHP SDK (facebook.php)
I put this at the following location:
./app/vendors/facebook.php
This will be used in the controllers and be imported by the controllers
B. JavaScript SDK
I put the entire “src” directory in the following location:
./app/webroot/js/src
Step 2: Create a “test” page where we can see the Facebook JS SDK to make sure it works
I just created a new file:
./app/views/pages/facebook.ctp
This will be visible at the following: http:///pages/facebook
Step 3: Copy the example in the jQuery folder, alter your default layout
Reformat the example after you copy it to the ./app/views/pages/facebook.ctp to take out the header stuff. We only need the body, and make sure you put the header stuff in the default layout. Below is the code to add to the default layout:
<!doctype html>
<html xmlns:fb="http://www.facebook.com/2008/fbml" xmlns="http://www.w3.org/1999/xhtml">
<head>
    <?php echo $this->Html->charset(); ?>
    <title>
        <?php __('CakePHP: the rapid development php framework:'); ?>
        <?php echo $title_for_layout; ?>
    </title>
    <?php echo $this->Html->css('cake.generic'); ?>
    <?php echo $scripts_for_layout; ?>
    <style>
        body {
            font-family: 'Lucida Grande', Verdana, Arial, sans-serif;
        }
        h1 a {
            text-decoration: none;
            color: #3b5998;
        }
        h1 a:hover {
            text-decoration: underline;
        }
    </style>
</head>
<body>
Simple code to put in to test the JS API:
<h1>Connect JavaScript - jQuery Login Example</h1>
    <div>
      <button id="login">Login</button>
      <button id="logout">Logout</button>
      <button id="disconnect">Disconnect</button>
    </div>
    <div id="user-info" style="display: none;"></div>

    <script src="http://ajax.googleapis.com/ajax/libs/jquery/1.3.2/jquery.min.js"></script>

    <div id="fb-root"></div>
    <script src="http://connect.facebook.net/en_US/all.js"></script>
    <script>
      // initialize the library with the API key
      FB.init({ apiKey: 'YOUR API KEY WOULD GO HERE' });

      // fetch the status on load
      FB.getLoginStatus(handleSessionResponse);

      $('#login').bind('click', function() {
        FB.login(handleSessionResponse);
      });

      $('#logout').bind('click', function() {
        FB.logout(handleSessionResponse);
      });

      $('#disconnect').bind('click', function() {
        FB.api({ method: 'Auth.revokeAuthorization' }, function(response) {
          clearDisplay();
        });
      });

      // no user, clear display
      function clearDisplay() {
        $('#user-info').hide('fast');
      }

      // handle a session response from any of the auth related calls
      function handleSessionResponse(response) {
        // if we dont have a session, just hide the user info
        if (!response.session) {
          clearDisplay();
          return;
        }

        // if we have a session, query for the user's profile picture and name
        FB.api(
          {
            method: 'fql.query',
            query: 'SELECT name, pic FROM profile WHERE id=' + FB.getSession().uid
          },
          function(response) {
            var user = response[0];
            $('#user-info').html('<img src="' + user.pic + '"><br />' + user.name).show('fast');
          }
        );
      }
    </script>
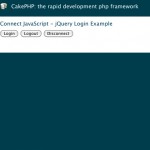
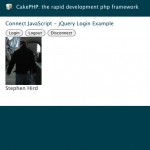
Now, you should be able to go to your page and see a login button, a logout button, and disconnect. If you are already logged in to Facebook, you should see your own profile image (if you allowed it). If not, click the login button, and if you have the Facebook application set up correctly, and the API correct, you should be able to log in.
Step 4: Check the PHP API
Now that we can see the JS API is working fine, we need to set up something so we can create a test for the PHP API. This is actually easier than it appears.
I first create a new layout just for the Facebook app, which I call facebook.ctp. It basically just erases all Cake icons, other special icons, and any kind of SQL output. Rename the title to “Facebook Testing:” (or whatever you want). Then create a new controller with no model. Use the App::importstatement to include the facebook.php file. Now create an index function, and copy and paste the PHP area from the example included in the PHP SDK into the “index” function. It may be similar to this:
<?php
App::import('Vendor', 'facebook');
class FbsController extends AppController {
	var $name = 'Fbs';
	var $uses = null;

	function index() {
	    // Set the layout
        $this->layout = 'facebook';

        // Create our Application instance (replace this with your appId and secret).
        $facebook = new Facebook(array(
            'appId'  => 'YOUR APPLICATION ID WOULD GO HERE',
            'secret' => 'YOUR SECRET KEY HERE - DO NOT DISPLAY THIS TO ANYONE',
            'cookie' => true,
        ));

        $session = $facebook->getSession();
        $appID   = $facebook->getAppId();
        $uid     = '';
        $me = null;
        // Session based API call.
        if ( $session ) {
            try {
                $uid = $facebook->getUser();
                $me = $facebook->api('/me');
            } catch (FacebookApiException $e) {
                error_log($e);
            }
        }

        $logoutUrl = '';
        $loginUrl  = '';

        // login or logout url will be needed depending on current user state.
        if ( $me ) {
            $logoutUrl = $facebook->getLogoutUrl();
        } else {
            $loginUrl = $facebook->getLoginUrl();
        }
        // Set the variables to use in the view
        $this->set(array(
            'facebook'  => $facebook,
            'session'   => $session,
            'me'        => $me,
            'logoutUrl' => $logoutUrl,
            'loginUrl'  => $loginUrl,
            'appID'     => $appID,
            'uid'       => $uid,
        ));
	}
}
?>
In this controller, we are setting the basics we need for the application. Using the SDK to see if they are logged in, getting our app id, and setting the proper variables to be used later. We set the login or logout URLs to display the proper links. Finally, we are setting the variables to be used in the view.
Now we need to create a new directory in the views area named “fbs” and a file in that directory named “index.ctp”. This view will house the base items for displaying the example. You can copy the HTML parts from the example.php and use them in this view. I modified it a little to alter what is shown.
<h2>Test Facebook File</h2>
<div id="fb-root"></div>
    <script>
      window.fbAsyncInit = function() {
        FB.init({
          appId   : '<?php echo $appID ?>',
          session : <?php echo json_encode($session); ?>, // don't refetch the session when PHP already has it
          status  : true, // check login status
          cookie  : true, // enable cookies to allow the server to access the session
          xfbml   : true // parse XFBML
        });

        // whenever the user logs in, we refresh the page
        FB.Event.subscribe('auth.login', function() {
          window.location.reload();
        });
      };

      (function() {
        var e = document.createElement('script');
        e.src = document.location.protocol + '//connect.facebook.net/en_US/all.js';
        e.async = true;
        document.getElementById('fb-root').appendChild(e);
      }());
    </script>

    <?php if ($me): ?>
        <a href="<?php echo $logoutUrl; ?>">
          <img src="http://static.ak.fbcdn.net/rsrc.php/z2Y31/hash/cxrz4k7j.gif">
        </a>
    <?php else: ?>
        <div>
          Using JavaScript & XFBML:
          <br />
          <fb:login-button></fb:login-button>
          <br /><br />
        </div>
        <div>
          Without using JavaScript & XFBML:<br />
          <a href="<?php echo $loginUrl; ?>">
            <img src="http://static.ak.fbcdn.net/rsrc.php/zB6N8/hash/4li2k73z.gif">
          </a>
        </div>
    <?php endif ?>

    <h3>Session</h3>
    <?php if ($me): ?>
        <pre><?php
        echo "session.base_domain - " .
            $session['base_domain'] . "<br />session.expires - " .
            $session['expires'] . "<br />";
        ?></pre>

        <h3>You</h3>
        <img src="https://graph.facebook.com/<?php echo $uid; ?>/picture?type=large" />
        <br />
        <?php echo $me['name']; ?>

        <h3>Your User Object</h3>
        <pre><?php print_r($me); ?></pre>
    <?php else: ?>
        <strong><em>You are not Connected.</em></strong>
    <?php endif ?>
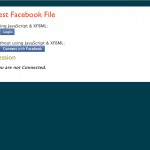
The login button examples will show two different ways to authenticate the user to the application. The JS example will open a new window and will log them in, post it back to the page and show the login. The non JS example will take the user to the page and give them the Facebook page to log in. Once they log in, it then redirects back to the calling page.
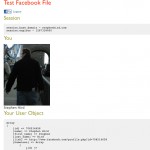
The information on the page shows the Session info, and below that, it shows a large profile image of the person logged in, and then an array of data of all public accessible information. If the person has set their profile to be private, then it will not show a lot of information.
These two examples can be seen at the following, with screenshots below:
The JS SDK example
http://www.stephenhird.com/pages/facebook
The PHP SDK example
http://www.stephenhird.com/fbs/
In the next post, we will work on getting a good discussion going, which is really, really simple, we will tie it to a DB saved question that can be entered thru an admin form, and then we will examine the moderation of the Facebook comments on the discussion.


interesting, thanks